Valentine’s Day is on Friday and with the coming Snow-magedden, it looks like we’re giong to be home boudn for a bit. I have been trying to stockpile activities for the girls so that when the come back inside from their five minute romp in the snow, we can avoid tears (theirs and mine).
What I should have done was waited until the last minute to do their Valentine cards, but when have I ever waited until the last minute for anything? Never. We did their Valentine cards during the Super Bowl pre-game show and I had been sitting on the idea and supplies for welllllll beyond that.
When it comes to crafts, I like to do things that are fun, easy, and take up relatively little time. I spend a lot of time on Pinterest looking at ideas, but I’m not going to be making thumbrpint jam cookies from scratch using jam I made with my organic, hydroponic berries in my DIY 4×4 rubbermaid wheelie tub. I’m not that kind of DIY. I’ve got a glue gun, but no glue sticks. I’ve got tons of scrapbooking paper, a Fiskar’s straight edge paper cutter with a dull blade, and an old pickle jar full of multi-colored brads. Truth be told, I’ve got a decent crafting kit. I can knock out some cute thank you notes if I’m ever in a pinch. When the Hubs coached C’s pee-wee soccer team, I made the team little paper ribbons. I didn’t spend more than $7 on supplies and the whole thing was done and cleaned up in about 90 minutes. My kind of craft.
Since the girls have been attending school, they haven’t really had to do cards for Valentine’s Day until M hit the first grade. In kindergarten and pre-k, it was okay if you wanted to do something, but you didn’t have to. I probably sent in some kind of treat for the class party, but at that time, they were too young to really get the gist of handing out Valentine’s. Come first grade, though, the stakes are amped up and I gladly accepted the challenge.
The first year, M’s class sent home a flyer instructing the parents to decorate a shoebox so that the children can bring it in for a Valentine’s exchange. Well, I figured if I was going to decorate the box, I was oging to go all in on the cards, too. If I have to get out my crafty kit to decorate the box, then I’m about to wreck shop on the Valentine’s themselves. I’m going full on craft-tastic. I only have myself and Pinterest to blame. Valentine’s Day 2012:
In truth, this project is pretty simple.
Step 1: Find a willing participant. Once I showed Morgan what I had in mind, she practically threw my camera at me and struck a pose. As for C, well, she said she wasn’t handing out Valentine’s in pre-k, so she became my (un)willing assistant.
Step 2: Have your subject pose holding their arm outstretched, their hand in a fist. We tried a couple different poses and decided to use these two.
Step 3: Upload the photo to your editing software of choice and add your desired text.
Step 4: Print out the images using 4×6 dimensions.
Step 5: Punch a hole or make a small X above and below the fist so that the stick of the lollipop slides through the card. I’d also put a piece of tape on the back so that the lollipop doesn’t slide out. Forgive the quality of these images. I was trying to make dinner, take the picture, stop the girls from eating the lollipops, and bouncing from foot to foot because I needed to go to the bathroom, but of all the things going on, that one always takes last place.
I printed these out on regular paper, but I would advise using cardstock or photo paper. The weight of that kind of paper is more durable and less likely to buckle under the weight of the lollipop. I’m also considering uploading the prints to one of the many online photo websites (i.e. Snapfish, Shutterfly, Kodak Gallery) and letting them do the printing and cutting.
And guess what? In 5 steps, I have justified spending countless hours on Pinterest finding things to demonstrate my prowess as a craft-master. Everybody wins!
For Valentine’s Day 2013, I went back to my Pinterest board and scrolled through what had been Plan B for the previous year.
Basically, you take a bunch of funny pictures of your little person. Using a program like Picasa or Google +, you can collage the pictures and add text. Print out the collages on regular paper (or get extra fancy and print them on cardstock) and affix them to Hershey Kiss filled baggies. Ta-Da! Done and done. I think the most time consuming part was the picture taking and the collage making. What I love about this one, besides the ease with which it is made, is that the photos totally capture the girls’ personalities. The bottom right picture for each of them is the pictorial representation of who they are through and through: Captain Crazy and Sweetness.
So, you know I’m at it again for this year, despite having read The Bloggess post about Valentine’s Day Under-Achieving. That just simply re-enforced my Type A commitment to this foolishness. I’ll leave you with the link here. This year, I decided against using photos (don’t want to saturate our audience) and switched it up.
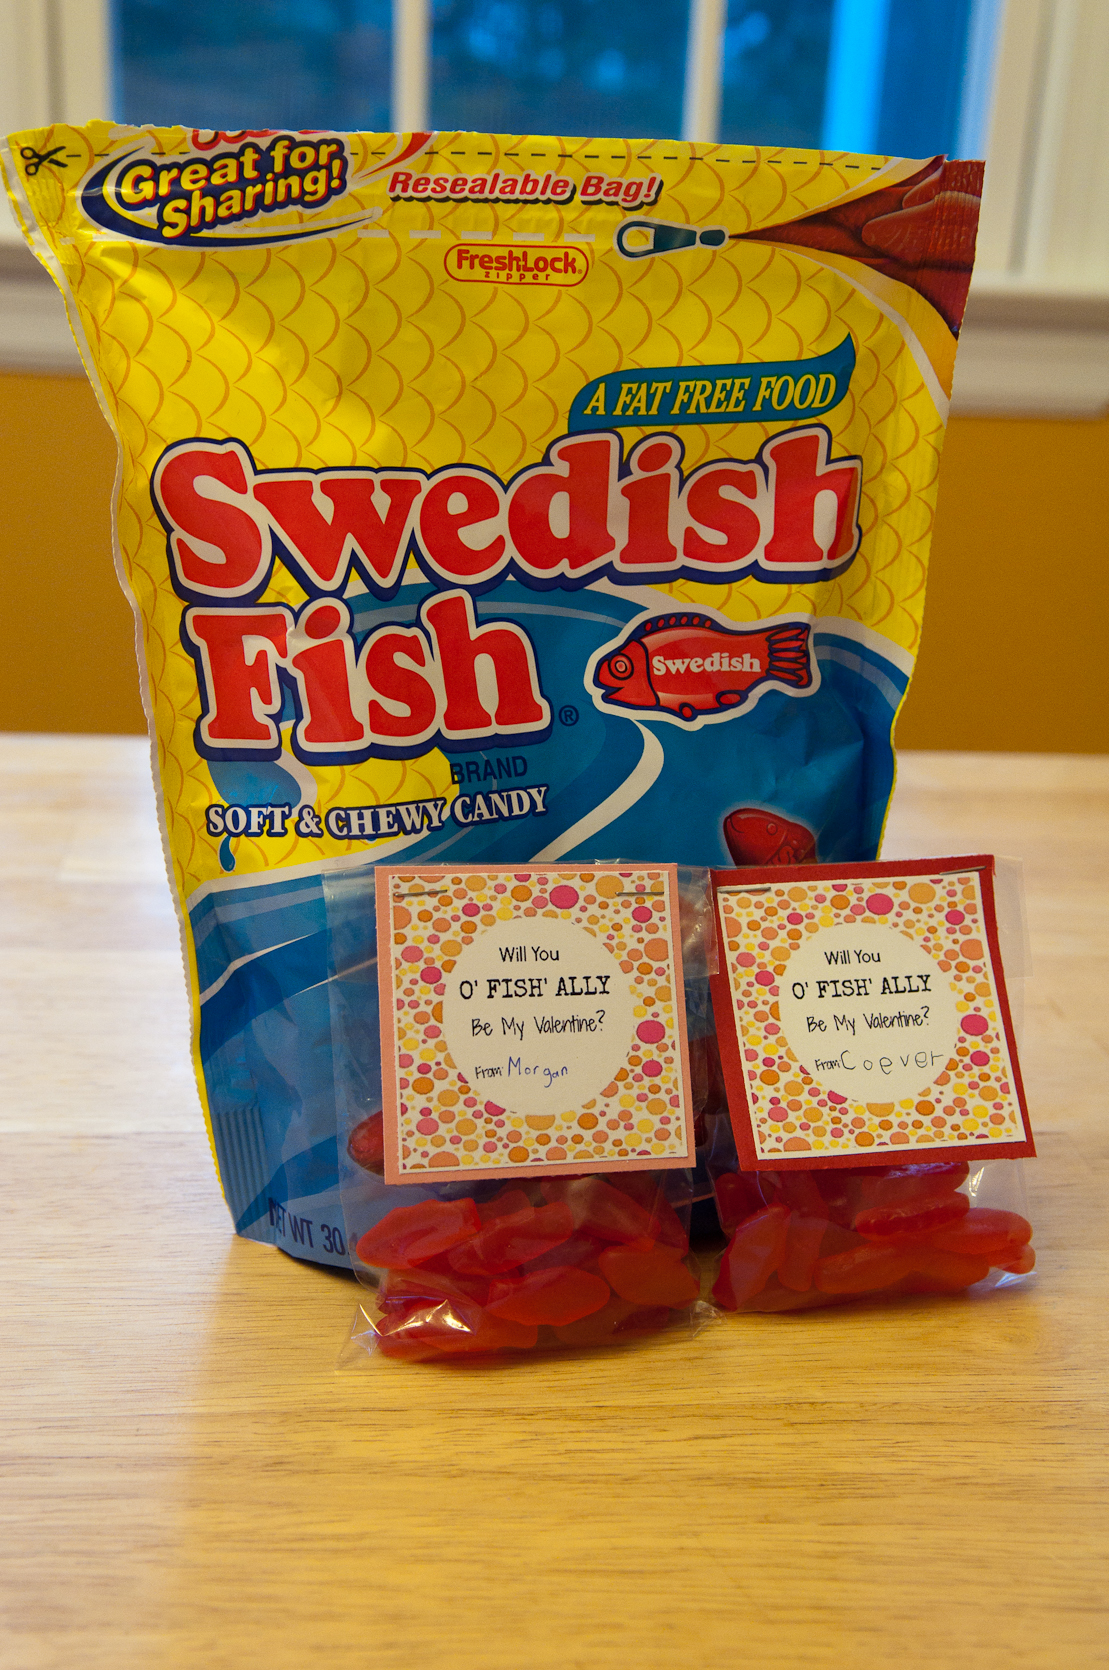
M & C want you to “O’ FISH-ALLY” be their Valentine!
Again, this was super easy. The hardest part was getting them to agree on what kind of fish to use — Goldfish or Swedish Fish and then trying to get the fish in the bags instead of their gaping mouths! I printed out the little sign from a download and stuck it to some card stock to give it some weight. We filled the bags with about 20 fish and stapled the card to the bag, sealing it off. The greatest amount of time was spent gluing and pasting, but again, all told, the whole things probably took an hour and a half.
If the snowfall is anything like what they’re predicting then I had better get back on Pinterest to start planning for next year’s card. We can probably knock it out between the first trip out in the snow and breakfast!


